Categories
development graphics various

Helsinki Metropolia University

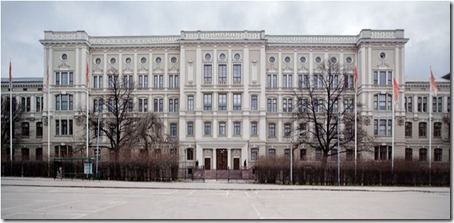
Last week I went at Metropolia University, one of the most famous and probably the best school in the entire Finland. They have lot of interesting courses and I went there to visit the Media Design course, especially the one connected to 3d graphic, digital animation and, of course, videogame development.

lucaderiublog.blogspot.com_Metropolia_logo
The first person I met was Pasi Kaarto, the head of 3D animation & visualisation studies, and mostly important a pioneer of computer graphic. I introduced my self as “the italian”, always speaking about something, leaving no empty space in our conversation 🙂
He was really polite and introduced me to the 3rd year class; they were/are working on an animation project that is really impressive as number of animated characters, joints, bones, vertex and so on. The animation is supervised by Jaana Wahlfors, an experienced director and Markus Elo, a really creative guy. At that moment of production they had a little pre-rendered sequences to verify the animations, but the most impressive thing, as said, were the number of animations they were doing. I was really surprised about the student’s interest in the subject, and the passion they put in that project. Everyone had his own computer and every student worked actively in the main pipeline, using Lightwave/3ds max for modelling (maybe UV mapping too, I didn’t asked), Photoshop for texturing, Maya for rigging and mentalRay for materials and render.
I really would like my students will have the same motivation and the same hardware support…this made me a bit depressed about it. I see the same passion in my student’s eyes, but I know the possibilities given to them are a bit different.
lucaderiublog.blogspot.com_bulevardi_720px
The trip was only at the beginning! we went to see the 1st class portfolio and what to say? Students already prepared for working experience. I think they don’t have so many things to learn regarding the technical aspects of 3D computer graphic. They had interiors, microphones, guitars, animated logos, tables with dishes, characters and animated things. The teacher asked them to animate some stuff without bones, so they invented accessible solutions to do this task. One of them created a mechanical tank with an incredible animation: detailed, expressive, dynamical and funny. I was also surprised by the work of another guy that created everything in Blender; he looked really interested in speed, showing me a speed-modelling exercise in which he crafted a car in about 15 minutes (if I don’t remember wrong).
This class was tutored by Lauri Huikuri, one of the most skilled lecturers. He was extremely prepared on all the aspects of 3D and visualization; it was so great speaking with people with the same passion…here at home sometime I feel a bit lonely.
We had a quick break at the 4th floor with Elina Vaeroe, the responsible of metropolia’s international affairs. We spoke about “secret” affairs and I discovered Metropolia’s fine arts and conservation courses worked in Naples with a local group for the reconstruction of a “Domus Pompeiana”. They gave me a book and reading it I discovered that Finish people are studying Pompei since a log time, around the beginning of the last century…interesting.
lucaderiublog.blogspot.com_helsinki_central
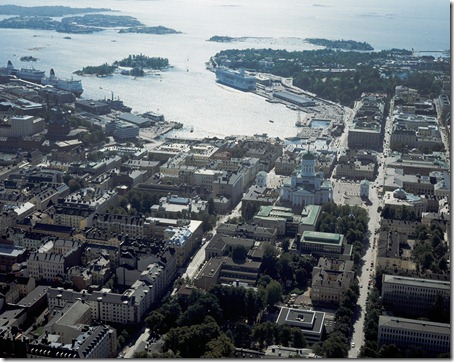
After this meeting we went to Helsinki centre to have lunch in a really cool restaurant. Time ago Berlusconi said that he coundn’t live in Finland because of food (one of his world famous bad jokes ;p), I think he didn’t tried good dishes. In this restaurant we met Peke Huuhtanen a visiting lecturer in Metropolia. He is actually a skilled animator employed at AnimaVitae Ltd. We spoke a lot about some subjects: Life in Finland vs life in Italy, schools and work in Helsinki vs schools and work in Milano, differences between our institutes, way to think, how to approach to work, football, weather, food, animation, UDK, renderer, realtime, and of course Alan Wake. I didn’t knew this game was a Finnish production and that inside the development team there are some Metropolia ex students. This is a proof of what I said at the beginning: Metropolia rocks!
After lunch they led me at the airport and after some troubles with planes I came back in Milano.
Nice trip, see you again in October!
A special thanks for this meeting goes to Mona Anniina Taponen that made it possible and to Pamela De Lorenzi that organized my travel.

Categories
development various

PLAYSYS | Mobile

Yesterday we put online the official mobile website of PlaySys.
Now you can surf it with your iPhone or iPod Touch without any problems with javascripts, layout problems, flash swf and other stuff.

Da oggi PlaySys è navigabile con dispositivi mobile come iPhone e iPod Touch! Uno script ad esecuzione automatica si occupa dell’identificazione del tuo dispositivo, offrendoti un’esperienza di navigazione senza interruzioni. Accedi al seguente link direttamente dal tuo dispositivo e prova un sito web completamente differente:

Enjoy on   WWW.PLAYSYS.IT

We changed a bit the index, now we have a great index.php hosted on www.play-sys.com.
The index.php code was written completely by Dr. Anurag Singh and we just tweaked the redirection code.

Of course we had to create different design for the mobile version, not only for the size and the bandwidth, but for other things regarding the surfing experience (like in traffic, at the toilet, in a taxi, during a call with another mobile, watching television and so on).

Now the structure of the site starts to be more professional inside the FTP and on a flowchart.
In fact the www.playsys.it (simple to keep in mind) redirect automatically to www.play-sys.com, using a server’s script. When on www.play-sys.com, a PHP code is executed (index.php by Anurag Singh) and the browser version is verified. From this point, the flow is different dependingly on the browser “family”: fixed, mobile, wap or psp. At the moment we have only 2 versions: fixed and mobile, the wap and psp are redirected to general mobile layout. After redirecting, your browser will display two different index.html that gives birth at two different surfing experience.

Categories
development graphics various

PLAYSYS | Cartoomics Ludica

Finalmente, dopo tre giorni di duro e rumoroso lavoro, si è conclusa la 17a edizione di Cartoomics e Ludica, i saloni italiani del gioco, videogioco e fumetto. Ovviamente PlaySys non poteva rimanere in disparte e già da Novembre 2009 ci siamo aggiudicati lo stand C20, in cui abbiamo esposto alcuni aggiornamenti dei nostri lavori. Il primo giorno ci siamo sentiti un po’ fuori dal coro, circondati da rivenditori di fumetti, manga , illustrazioni, stampe e altro materiale a tema, poi sabato e domenica siamo stati bombarati di domande tecniche e varie richieste pertinenti al nostro ambito di ricerca e sviluppo.

Beatrice e Luca
Ancora una volta ci è stato propoto di spostare la sede di PlaySys da Milano a Toronto e la cosa sta iniziando a diventare più seria di quanto previsto: “il mercato italiano è morto” è stato affermato da più di una persona, ed in effetti il panorama economico, burocratico e politico che stiamo vivendo nel notro Bel Paese non è dei migliori.
Siamo entrati in contatto con realtà commerciali e produttive interessate ad avvicinarsi alle nostre tecnologie o ai nostri risultati nella ricerca, e questo era il nostro target principale.
Abbiamo conosciuto professionisti che sono entrati in contatto con la nostra realtà…e sicuramente la cosa potrà portare interessanti vantaggi reciproci.

Mona e Luca
Per quanto riguarda i giovani talenti, molte persone si sono avvicinate, attratte dalle nostre realizzazioni 3D, ed hanno scoperto di cosa ci occupiamo. Molti sono rimasti sorpresi nel trovare una delle pochissime software house italiane che si occupa di ricerca in ambito videoludico. Ovviamente non abbiamo parlato solo di videogiochi e 3D, ma abbiamo mostrato i nostri prodotti editoriali, le nostre partecipazioni e collaborazioni in ambito musicale e altro ancora. Sempre a riguardo di giovani talenti, posso annunciare il ritorno a gonfie vele di D3vStudio, che si occuperà proprio di talent recruitment in ambito videoludico.

Pamela
L’argomento che in assoluto ha avuto più successo, oltre allo sviluppo di videogames, è stata la notizia di Play-Institute, ossia l’istituto di formazione che avvieremo entro la fine del 2010. Si tratterà di un istituto di computer grafica, pre-produzione, programmazione e sound design, interamente orientato al mercato dei videogames. La differenza con gli altri istituti è sostanzialmente questa: noi offriremo conoscenze e insegneremo agli studenti come inserirsi praticamente nel mercato del lavoro. Play-Institute sarà una scuola per offrire istruzione, non per generare un guadagno ai suoi proprietari.

Martinelli e Crimì
Insomma, l’impressione sull’evento è stata più che positiva, dall’organizzazione alla partecipazione dei visitatori. Al nostro stad hanno partecipato alcuni professionisti, miei studenti presso Naba Milano e amici, generando così un dibattito continuo sulle nuove tecnologie e sul loro impiego in tutti i campi di cartoomics e Ludica.
Grazie a tutti quelli che hanno partecipato all’evento e che sono venuti a trovarci!!!

Molly *grafica rubata durante il disallestimento 🙁
Categories
development graphics

New 3ds Max Script: PLAYSYS | P.S.R.

Share
|


Let me introduce a plugin I wrote for 3ds Max during our last big-as-size render.
It is called P.S.R. (PlaySys Split Render) and is a great tool to render images with amazing size. The idea behing is really simple and partially used by some renderers like Mental Ray, final Render or V-ray: it splits the entire render in sub-pieces and then processes them as single images (subdivided again by the buckets of the renderer in use).
We had to render some images with a size of 7500×5000 for a total of 37.500.000 pixels (37,5 Megapixels) and this saves the entire production…next script I must write has to convert pixels in €! 🙂

HOW IT WORKS
The script’s user interface will detect automatically the renderer and the size you have to process. The first parameter to setup is the fraction of the image, in the picture it is 3, so it means 3X and 3Y so 9 sub-images.
Automatically, based on the render size and the fractions, the script will calculate the size of the sub-image:213×160.

By default I use a tolerance of 25 percent of the image. This tolerance is a little overlap of the sub-images, and is really important to obtain a seamless connection beetween sub-images.

Always depending on the fraction number, you’ll have a number of buttons called Matrix#, theese buttons can show you a preview of the rendered sub-image and, checking the Auto flag, when you press a Matrix# button, it fires up the renderer.

Like lot of my scripts, this can look a little unuseful, but if you have to manage an entire workflow with human-electronic resources, this can save time and money…expecially because avoid crash of big scenes.
…oh, and it integrates with Maxwell~Render 😉

 I have yet a list of improvements to do:

  • First in the image area you see in the middle you will have the entire image, so I will render in a VFB and keep the full quality image in that area. You will have the possibility to reopen it, execute a new sub-image or save the image in a layered PSD Photoshop file;
  • I want to add a “Batch” command that executes all the renders in sequence;
  • I have to design a new User Interface that let the team use an N fraction, not only 1, 2^2 or 3^2 sub-images (yeah, I have to remove the 1^2 size ;))
  • I have to insert instructions and maybe I will append a rollout with a lite version of DMRB, my previous semi-realtime renderer;

We will use this tool internally at PlaySys, but I have not to exclude the idea to share it in future. Before of that, I will speak about it and other pipeline and workflow improvement strategies in my next book.

Categories
development

New project for iPhone/iPod Touch

Last week we started a really cool project for the Apple iPhone/iPod; the name is not official so I will call it “iSomething“.
With iSomething you can simply overlay 3D meshes on real photo, creating a sort of augmented reality. iSomething does not work with movies and requires a quick interaction with the user after the shot.

At the moment I have no official images or videos of iSomething, so this post have to wait a little to be completed, but this confirm how we work at office and how my tech-ideas are transferred to reality…it’s a great satisfaction to see ’em working!

Categories
development graphics

New 3ds Max Script: PLAYSYS | B.M.R.

We finished a new Autodesk‘s 3ds Max script that allow us to batch create textures, assign materials, hide objects, set properties, renders scene, add channels , and save in RPF file (plus .png).
it could appear unuseful if you have to render 3 or 4 times in a day, but for some projects we should need to create lot of renders (in the current one about 58.000) and it would become a mess without this script.

So, I’m glad to introduce our new friend: PLAYSYS | B.M.R.

The workflow is really simple:
– prepare your 3D models in the scene
– prepare the texture you’ll need to apply
– select the render settings
– press the “Create” button

the utility will do the remaining things, mixing 3ds Max possibilities with BMR’s functions. After a little you will find all your renders ready to be used. The utility will name the images with: $filename_$object_$texture_#progressivenumber.extension

Categories
development graphics

Sub Surface Scattering | mental ray – part 2

Some time ago I wrote some notes about Sub Surface Scattering in mentalRay. Here I post some screens of the material I used in my turntable test, using Knoss’s Arak model.

As you can see the shader is quite complex, so start exploring this simple one and take time to understand how parameters works.

Here is a schematic description of the maps I used

The next one i a new scheme that can give better results. At the moment I’m still working on this structure. I have to prepare new textures for the Subdermal and Epidermal channels, but I will do them for a new model I’m working on.
Enjoy

Here is the material I used. You’ll have to substitute the two required textures with your own, btw, theese are only for displacement and bump. Feel free to use it and share.

Categories
development various

PlaySys Percent – Tool gratuito per conversioni tra valori (IRPEF) netti e lordi

È finalmente disponibile PlaySys Percent, il software che semplifica il calcolo delle diverse percentuali tra lordo e netto.
Scaricalo ora da QUI, è gratis! [52.1 Kb, versione 1.1 corretta grazie alle indicazioni di Andrea Benedetti]

Più volte mi sono imbattuto nella trasformazione tra valore netto e valore lordo (9 volte su 10 per via dell’I.R.P.E.F.), così ho deciso di sviluppare questa semplicissima applicazione che mi auguro possa tornare comoda a qualcuno.
Molti cadono nell’inganno che per ricavare il lordo da un valore netto basti sommare a quest’ultimo semplicemente la percentuale (in questo caso 20%). Così non è, infatti quando si calcola il netto di un valore si procede in maniera opposta, ossia si parte dal lordo e si sottrae il 20%. Purtroppo però, se Y = X – 20% non si può dire che X = Y + 20%.A questo punto entra in gioco la mia applicazione: basta inserire il valore netto e la percentuale da applicare e verrà ricavato il lordo.
Ho aggiunto anche una funzionalità incrociata ossia, dato un lordo ed un netto ricavo la percentuale tra i due e dato un lordo e una percentuale ne ricavo il netto.

Non sei convinto? esegui con la calcolatrice 100 – 25%, otterrai 75. Ora fai l’opposto, esegui 75 + 25%, non otterrai 100 :)Buon divertimento con PlaySys Percent! [52.1 Kb]

Categories
development graphics

DACS 1.7

DACS is the acronym for “D3v Anti Crash Saver” and is a little utility I wrote on 23th December 2005 (I always have a log inside my project folders ;)) and that prevents the common damage of scenes, caused by a crash of Autodesk 3ds Max.
Who uses this 3D package for knows for sure how frustrating it is to re-work on a scene because a crash deleted it. In fact, while 3ds Max crashes, the scene is damaged and the file will contain a little chunk of the entire work; this happens about 1 time on 10 crashes.
After this, when you try to reopen your file, 3ds Max says that it is corrupted and the data are completely lost.

There are 3 solutions to this problem:
– Do a frequent backup of your folder and files
– Increment your scene version with a progressive number
– Use my DACS 😉

The utility consists on a simple script of 3 Kb and it is loaded in the common way from the MAXScript menu. You can use the StartupScript folder too. In the previous image you can see how it appears when loaded.
As you can see, it automatically finds the file name and the path of your project. This script was written before that Autodesk introduces the new folder structure, similar to the one adopted in the old versions of  Maya. This means that DACS saves the files in the same folder of the project (this is yet in my TODO list).

At this point you can start working safely: my script will inform you about the time from the latest save and when you press the button “Save Files” it will save your file plus two additional files, completely identical.
If your system crashes or the light goes away or the operative system gets stuck, DACS will maintain the integrity of the scenes, at least one of them 😉

Many thanks to Giorgia Foresta that spent time correcting my terrible english!

Categories
development graphics

DMRB 2.2

DMRB means D3v Multi Render Basket and is a little script I wrote about 3 years ago.
The idea behind comes from Lightwave’s fPrime, a quick semi-realtime renderer that is fully integrable in the 3D package and permits to render with almost anything doable inside it.
DMRB uses the default renderer to compute the image so, if you are working with mentalRay you can benefit of all it’s features such as Sub Surface Scattering, Final Gather, Global Illumination, Caustics, and so on.
Of course if you use other internal third party renderers (Scanline, VRay, FinalRender, Brazil) it still works fine!

In the video below you can see it with a very simple scene, that permits me to show it’s usefullness.
Note that it is very different than the ActiveShade because DMRB shows the entire result, without optimizations (btw, some can be enabled on the panel) and again, it works with all the major renderer.